


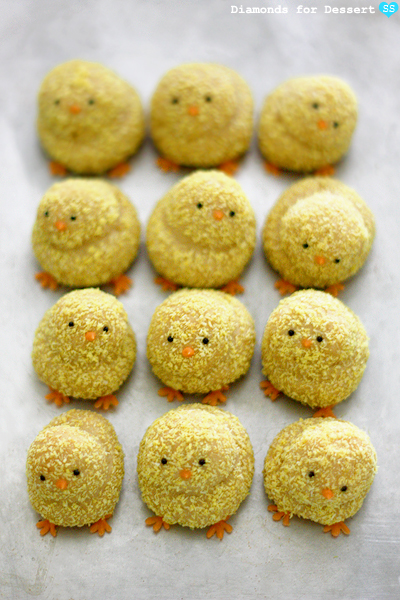
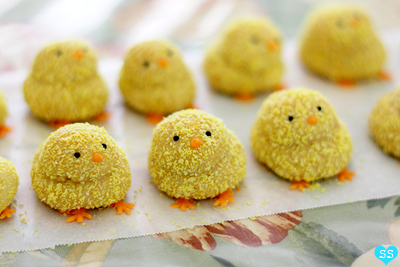
Hope you all had a good Easter! I celebrated by making some chick cookies. I already made chick sugar cookies two years ago for Easter, but this year I thought instead of flat decorated cookies, I'd come up with some actual 3D chick cookies. After some trial and error, these turned out pretty well. They're the perfect springtime cookie.
Since Easter usually involves lots of candy like chocolate rabbits and jellybeans, I decided to make a cookie that was less cavity-inducing than the typical Easter dessert. I found this recipe that makes a nice, lightly sweetened cookie. I love the combination of lemon and honey. Because the recipe only uses a little bit of butter the resulting texture of the cookie is soft and cakey, in a good way. Finally, the coconut adds a hint of flavor and some cheery color. Enjoy!
Easter Chick Cookies
adapted from Anja's Food 4 Thought
1/8 cup (2 tbsp) butter, room temperature
1/4 cup honey
1 egg, room temperature
the zest of 1 lemon
1 cup + 2 tbsp flour
1/8 tsp salt
1 tsp baking powder
1 tsp lemon extract (optional)
1/2 cup desiccated coconut*
yellow gel food coloring
orange candy melts
black nonpareils
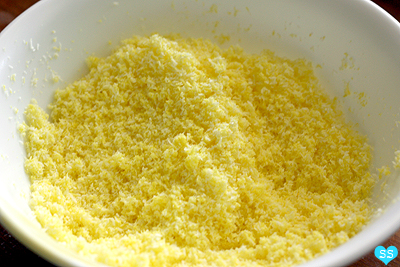
Add a drop of the food coloring to a bit of water to dilute the color. Mix some of colored water to the desiccated coconut to color it, mixing until all the coconut is yellow. It's better to add the colored water a little bit at a time because you don't want the coconut to be wet, just colored. Once it's all yellow, set it aside for now.

Melt some orange candy melts. Use a toothpick to draw lots of chick feet (one long line surrounded by two short lines) onto parchment paper with the melted candy melts. Let dry to use later.
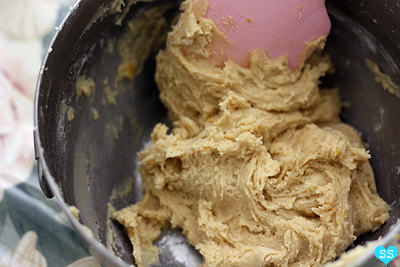
Mix the flour, salt, and baking powder in a bowl; set aside for now. In another bowl, mix the butter and honey. Add the egg, lemon zest, and if using, lemon extract. Now mix in the flour mixture with the wet ingredients until a dough forms. Wrap the dough in plastic wrap and chill it overnight, or at least for a few hours.
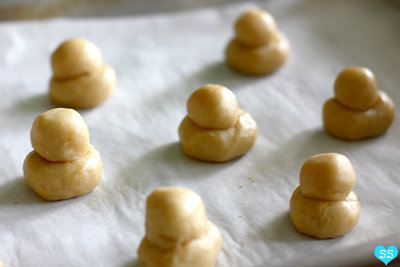
Preheat the oven to 300°F. Divide the dough into 24 pieces. Take one of the pieces, pull off 1/3 of it, and roll it into a small ball (head). Roll the other 2/3 of the piece into a large ball (body). Place the large ball onto a parchment paper lined baking sheet. Use your finger to make a small indentation in the center of the large ball. Place the small ball over the indentation and make sure the head is firmly attached to the body**. Repeat with the rest of the dough.

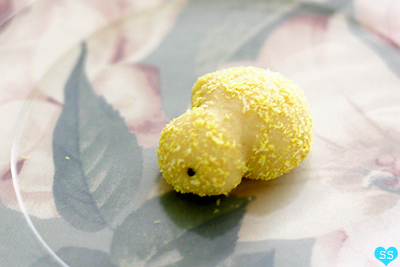
Push two black nonpareils into the head of each dough chick for eyes. Then roll each chick in the yellow coconut, making sure each dough chick is fully covered. Place all of the coconut covered chicks back on the lined baking sheets. Bake the cookies for about 16 minutes, until the cookies are lightly browned. Let cool on the baking sheets.
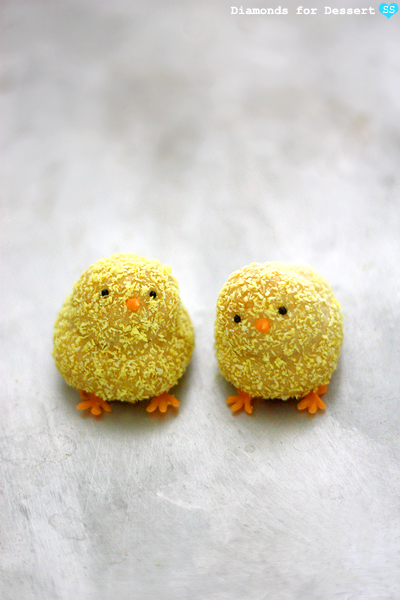
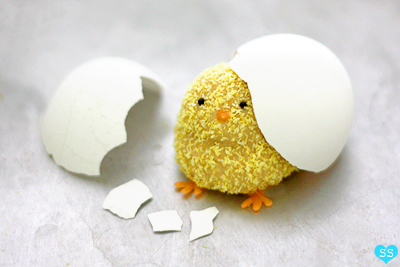
Once the cookies are cooled, it's time to finish decorating them. Take a toothpick a carefully brush away the coconut covering the chick cookie eyes. Also, brush off coconut a little bit below the eyes to make a smooth space to put the beaks. Melt some orange candy melts. To make the beaks, use a toothpick to spread a little dab of melted candy in the smooth spots you just cleared off and pull away from the cookies so the candy forms a point.
Take two candy feet. Place them about 1cm apart on a piece of parchment. Dab each foot with some melted candy and then press a chick cookie on top of both feet, with a little bit sticking out. Repeat with the other cookies and let them dry. If necessary, hold the cookie upside down and add some more melted candy to better hold the feet in place. Then replace on the parchment paper to dry.
Makes 24 cookies
*The desiccated coconut I used was very fine and unsweetened. If you can't find finely shredded coconut, take unsweetened dried coconut and grind it up in a blender or a food processor.

So lovely
ReplyDeleteThese are too adorable! I wouldn't want to eat them cause they're so cute. :)
ReplyDeletethese are exactly my thoughts!!
DeleteWhat an amazing recipe and the results are adorable!
ReplyDeleteVery adorable. So adorable that I'd never eat them! (Plus I'm a vegetarian. ;-) Really enjoy your blog, Susan.
ReplyDeletexo,
Margaret
--
The Bite Size Baker
Thanks! Interesting, your comment makes me wonder how vegetarians in general feel about eating animal shaped cookies.
DeleteHaha those are adorable!!!
ReplyDeletethey are absolutely adorable!
ReplyDeleteOMG the most precious things I've ever seen! How can you bear to eat them?! (haha)
ReplyDeleteThey are super cute!!!
ReplyDeleteThis are adorable!
ReplyDeleteI just made the macaron version of these on my blog :)
http://www.atasteofkoko.com/2012/04/easter-macarons.html
Cute!
DeleteThose are absolutely ADORABLE! Love it... One of the cutest things I've seen this season... Thanks for sharing!
ReplyDeleteThese are possibly the cutest little cookies I've ever seen! Love their little fat bodies and tiny feet and beaks - so so sweet!
ReplyDeleteThey look so cute! I think I will be using Starburst candies for the feet. I ran out of candy melts...Thanks!
ReplyDeleteGood idea for a substitution :).
DeleteSo cute!!!
ReplyDeleteAwesome. Simply awesome :-D
ReplyDeletewow, so adorable!!! love these :D
ReplyDeleteadorable!
ReplyDeleteThese are the cutest chick cookies ever! Such a realistic result with your technique!
ReplyDeleteyou make the best stuff--always look forward to seeing your creations! just pinned these!
ReplyDeleteGORGEOUS!!!
ReplyDeleteAll of your creations are fabulous! My friend introduced me to your blog and she has tried baking all of the desserts on you blog. You're amazing!
ReplyDeleteWow, I'm surprised you friend has baked all the desserts here. That's awesome!
DeleteHello Susan
ReplyDeleteThanks for the easter chick cookies recipe.
I'll create one for sure, my kids are gonna like it :)
If you don't mind, can I submit your easter chick cookies photo in http://www.foodporn.net ?
It's a food photography site full of all DIY food pictures from members around the world. Or perhaps you'd like to submit by yourself? Let me know when you did, so I can share it.
I've actually never heard of foodporn.net before. Thanks for sharing it with me! I will check it out.
DeleteSusan, these are one of the most adorable Easter cookies I've ever soon! I can't wait to include them in my Easter sweets roundup next week!
ReplyDeleteThese are so cute
ReplyDeleteThese are so adorable and creative! I can't wait to try these for Easter : )
ReplyDeleteI am excited to bake these this weekend, I am going to roll them in yellow sugar sprinkles because I despise coconut.
ReplyDeletemade these but the coconut would NOT stick to the cookie dough. When I baked them the head just incorporated into the body. So it looked like a little lump on a big lump. But it didn't look like a head. What went wrong. They are yummmy. But instead of coconut I think I'll try it with frosting. Just saw Sarah's comment that she would roll them in yellow sugar sprinkles. That may work too. Disappointed on the original recipe. boohooo
ReplyDeleteI made these cookies and they're in the oven now, but I checked on them now and unfortunately they've spread ... I used your recipe exactly and left the dough overnight. Do you think next time I should add more flour?
ReplyDeleteI am having some of the same issues as some of the others. Coconut won't stick to the cookie balls and they spread in the oven. Any tips on how to fix this? There are super cute.
ReplyDeleteTry refrigerating the shaped dough on the cookie sheets for an hour or two before baking, or until thoroughly chilled. Only put the sheets in the oven when it's preheated, taking them out of the fridge and immediately baking them.Take the sheets out of the fridge and put the straight into the oven, with no time at room temp. This should help them keep their shape when baked, without the addition of more flour, which toughens your product.
Deletelovely :)
ReplyDelete