Apparently my blog is 4 years old! As I've done in the past, I want to share recipes for my favorite cakes for my blog's belated birthday. Today, I'll be sharing a new favorite of mine: the Coffee Crunch Cake. This summer, I was back home in California doing research in SF, a city near and dear to my heart. Throughout the summer, I spent my time after work and on the weekends exploring the city: the bakeries (duh!), restaurants, ice cream shops, food trucks, bars, art museums, shopping, etc.
I discovered a tiny bakery in Japantown that's known for Coffee Crunch Cake, something I never heard of before, but with all the good review on Yelp, I decided to take a risk and get it. Well, it was delicious! Naturally, I decided that I needed to make one at home from scratch. By the way, just fyi, back in the day (in the 60s), there used to be a pastry shop/candy store/soda fountain in SF called Blum's which was where this cake was created. The shop is no longer open, but the cake is still made at a few select bakeries in CA, and, of course, you can make it at home :)!
I like to call it "the Thing" cake (you know, Fantastic Four). It's not the most attractive cake (I do think it's eye catching though), but it tastes amazing. Like a creme brûlée flavored cake! It's made of a few layers of fluffy chiffon cake alternating with plenty of freshly whipped cream and covered with lots of yummy honeycomb candy AKA coffee crunch. For me, the best time to serve this cake is a few hours after decorating, after it has chilled it in the fridge; at this point, the coffee crunch has had time to melt into the whipped cream, yet it still retains its crunch. Yum!
November 18, 2013
September 23, 2013
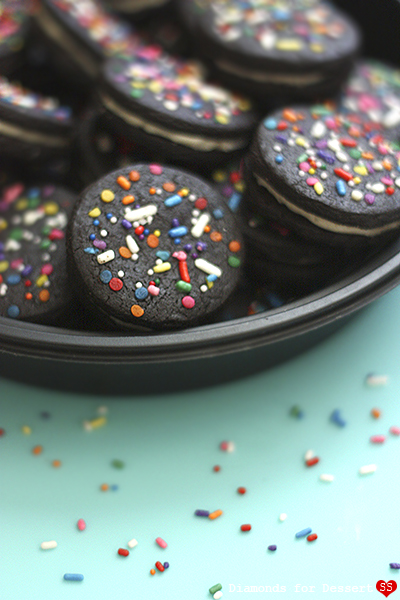
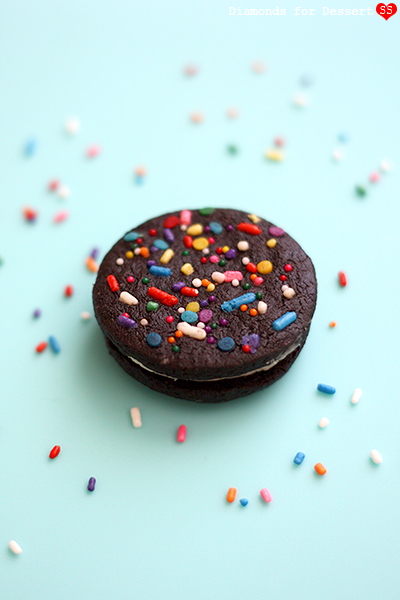
Homemade Celebration Oreos
It's been a while... Originally I planned this post for July 4th, so I could use my red, white, and blue sprinkles, but there was a terrible heat wave and I couldn't summon the fortitude to turn on my oven.
Hot weather + baking = no way!
When I finally got down to making these cookies, July 4th was past, so I wanted to adapt my original idea into something less holiday specific. That's how I ended up with these Homemade Celebration Oreos. Remember when I made TKOs (Domo-shaped ones, to be specific)? Well, I thought they were wonderful, but they definitely were not what I think of when I crave an Oreo. What I want in an Oreo is a crisp, chocolate, slightly salty cookie with a white, shortening-based filling, which I got by combining two popular homemade Oreo recipes (the one from Flour Bakery for the cookie and the one from Retro Desserts for the filling).
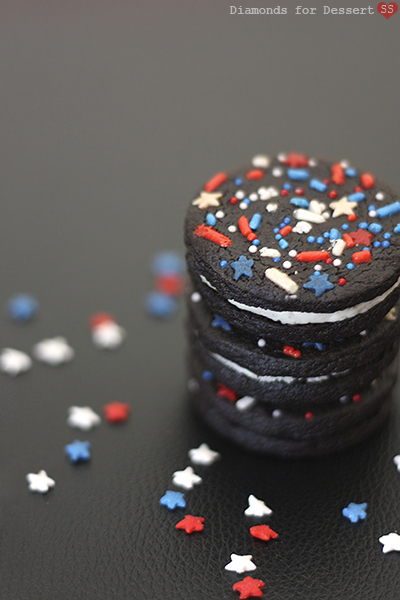
To give them a special homemade touch, I covered them with rainbow sprinkles (3 kinds... because I could :D)! Perfect for any celebration since desserts and celebrations go hand-in-hand. Great for a birthday. Any sort of party. Or just because you want to brighten up someone else's day. But feel free to customize them for a specific occasion. Red, white, and blue sprinkles for July 4th (pictured below). Green, red, and gold sprinkles for Christmas. Assorted baby blue or baby pink sprinkles for a baby shower. The colors of your favorite sports team. The possibilities are endless!
P.S. Feel free to make them sprinkle-less. They're just as delicious ^_^.
P.P.S. I still made some 4th of July cookies in the end. Just because :).
June 16, 2013
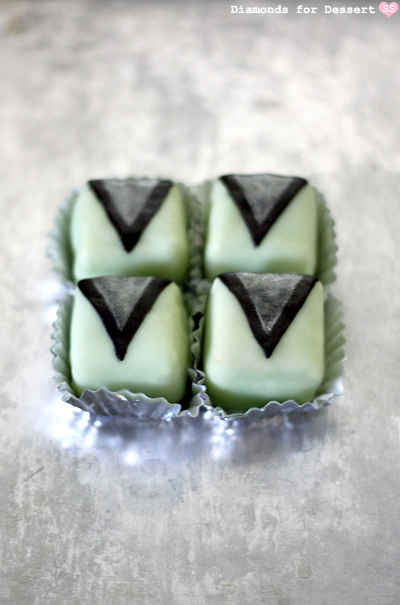
Art Deco Petit Fours
Finally, my first post this summer. I definitely have a lot of posts in mind (and on the back burner, some even from last summer :O), just trying hard to find the time to put them together. At least I'm back home for the summer, which means I have 24/7 access to an oven :).
A few weeks ago, I kicked off the summer with a 1920s cocktail party. I had just seen The Great Gatsby in theaters a few days before the party, so I was pretty inspired to make a lavish, yet delicate dessert. There's this one scene where Gatsby, Daisy, and Nick have tea at Nick's little cottage. Gatsby has all these lovely flowers and desserts (macarons and tiered cakes) brought into to fill up the house. At first I was going to bake macarons, but that seemed too obvious of a choice. And I didn't want to make a full cake since it was a cocktail party with appetizer-type foods. Finally, I settled on petit fours.
While searching for the perfect petit fours recipe, I came to the conclusion that they are difficult to make.... which pretty much sealed the deal, since you all know I love a good baking challenge. Since petit fours tend to be little square cakes, I decided that it would be fitting to decorate them in an Art Deco style (popular in the 1920s), with geometric shapes and clean lines. I searched high and low for the perfect cake and poured fondant recipes to use, to make sure this would be a success.
I knew a variety of different cakes could be used for petit fours, but I ended up with a sturdy genoise since I wanted a cake that wouldn't fall apart when I dipped them in fondant. Also, I found the perfect poured fondant recipe. I wanted a fondant that was opaque and good for dipping, so this fit the bill. And yes, though it's called "poured" fondant, I decided to dip the cakes in fondant rather than pour them since pouring fondant seemed to be the biggest hassle for bloggers making petit fours. So in the end, this turned out rather well, not really a challenge after all. Lovely little cakes, perfect for a party.
Tags:
1920s,
art deco,
book,
cake,
movie,
petit four,
The Great Gatsby
May 04, 2013
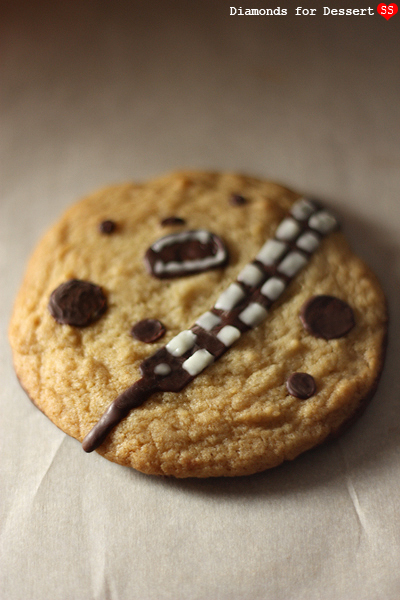
Chewie Wookiee Cookies
Happy Star Wars Day! I made these Chewie Wookiee Cookies at the end of spring break for my brother (who's a huge Star Wars fan & loves CCCs) since his break was the week after mine and I wouldn't get the chance to see him. My mom suggested leaving him a note, but I thought cookies would be better (i.e. more delicious) :D.
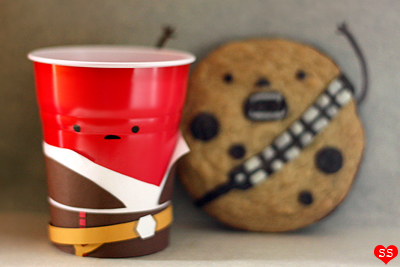
So the story behind these cookies started a few years ago, when I saw Philip Tseng's "Han Solo Cup & Chewbacca the Cookie" (below) online. Seriously, baked goods and Star Wars in an adorable presentation; it does not get better than that. And you know I'm all about the food puns :). Btw, check out the other illustrations on his site for more food illustrations (even a "Cherry Pie-rate"! Remember my Apple Pie-rate Ship?) and pop culture references (Adventure Time, TMNT, Arrested Development, Fantastic Mr. Fox, Back to the Future, Gameboy). If you like them, many are available as t-shirts and prints!
Okay, flash forward to last year. I was visiting my brother in LA and saw his new Threadless shirt, with that same graphic! After seeing it again, I knew I needed to bake these cookies. Plus I'd been hoping to make something Star Wars related for a while. I took out my staple Thick & Chewy CCC cookie recipe and adapted it to this project.
I knew I'd be decorating the cookies with chocolate, so I left out the chocolate chips (feel free to leave them in if you like things extra chocolatey). And since I had some mini red Solo-ish cups lying around, I busted out my craft skills and decorated one of them, because just like Han needs Chewie, cookies need a cup of milk.
P.S. If you don't use all the cookie dough to make the Chewie Cookies, take the remaining dough, add chocolate chips, cut up some Snickers bars, and make Snickers stuffed CCCs!
So the story behind these cookies started a few years ago, when I saw Philip Tseng's "Han Solo Cup & Chewbacca the Cookie" (below) online. Seriously, baked goods and Star Wars in an adorable presentation; it does not get better than that. And you know I'm all about the food puns :). Btw, check out the other illustrations on his site for more food illustrations (even a "Cherry Pie-rate"! Remember my Apple Pie-rate Ship?) and pop culture references (Adventure Time, TMNT, Arrested Development, Fantastic Mr. Fox, Back to the Future, Gameboy). If you like them, many are available as t-shirts and prints!
[Han Solo Cup & Chewbacca the Cookie | Image Credit: Philip Tseng]
Okay, flash forward to last year. I was visiting my brother in LA and saw his new Threadless shirt, with that same graphic! After seeing it again, I knew I needed to bake these cookies. Plus I'd been hoping to make something Star Wars related for a while. I took out my staple Thick & Chewy CCC cookie recipe and adapted it to this project.
I knew I'd be decorating the cookies with chocolate, so I left out the chocolate chips (feel free to leave them in if you like things extra chocolatey). And since I had some mini red Solo-ish cups lying around, I busted out my craft skills and decorated one of them, because just like Han needs Chewie, cookies need a cup of milk.
P.S. If you don't use all the cookie dough to make the Chewie Cookies, take the remaining dough, add chocolate chips, cut up some Snickers bars, and make Snickers stuffed CCCs!
April 01, 2013
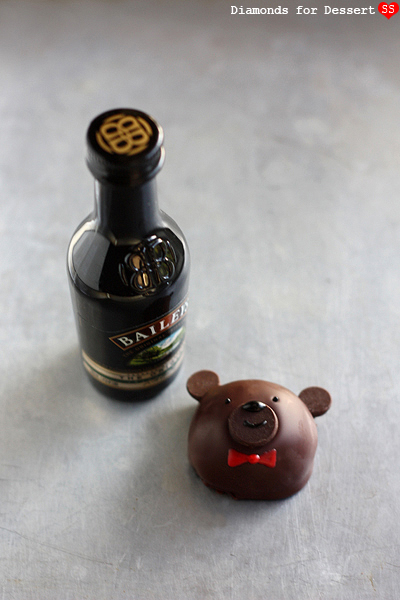
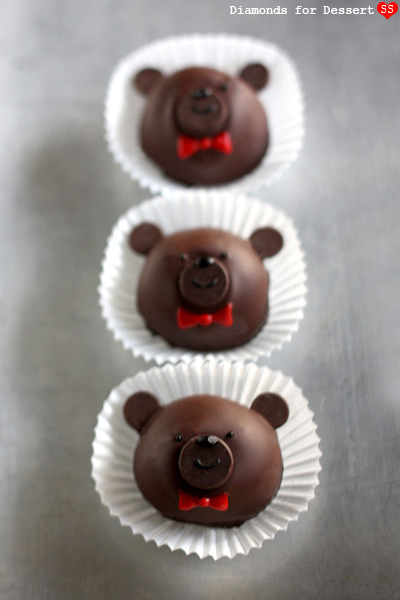
Bailey's Bear Truffles
I'm sure you've noticed the lack of posts these past 2 months, all due to computer woes and the lack of a decent kitchen. But no worries, I was recently home for spring break, and I finally had the time to create some desserts!
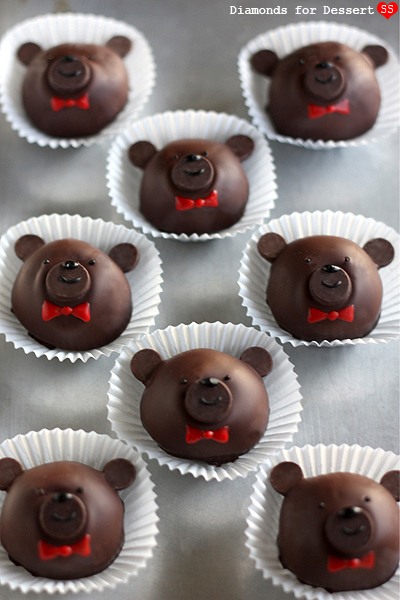
Actually, I've made these Bailey's Truffles a few times already, with rave reviews. The great thing about truffles is that they don't require a lot of ingredients and are rather easy to make, yet everyone always thinks they took more work than they did ;). Being without a kitchen has made it hard to get any baking done this year, but with a microwave and a mini fridge, these truffles were definitely doable.
Usually truffles are just rolled into balls and either dusted with cocoa powder or dipped in chocolate, but I wanted to play around with the shape of my truffles just to see if it could be done (without any molds or any fancy equipment)... and somehow I ended up with truffle bears. But then I figured, everyone likes bears, what with teddy bears being so popular, so why not?
To give them a pop of color and to spiffy them up, I gave my bear truffles bow ties (plus I just really like bow ties). The ties also allow for a bit of customization. The first time I made these bears, I gave them green bow ties for St. Patrick's Day, while for this blog entry, I gave them classic red ones. But of course, these truffles don't have to be shaped into bears. Rolled into balls, dipped into chocolate, and topped with whatever you want: sprinkles, a white chocolate design, or even left plain, they're still equally delicious!
January 14, 2013
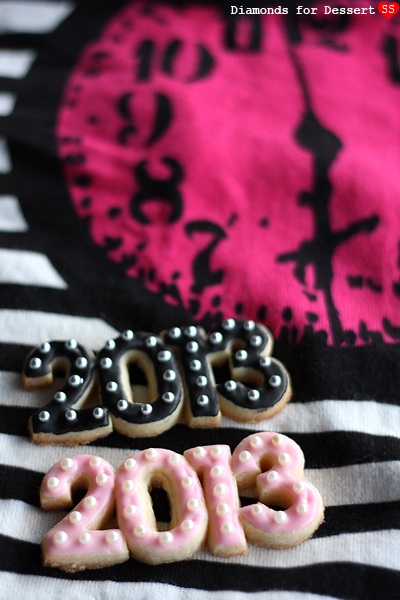
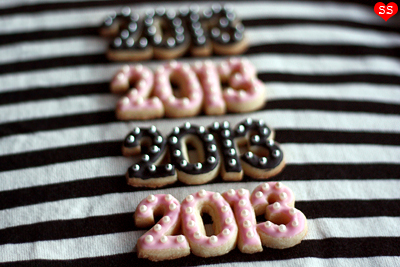
Happy 2013!
Another year over and a new one beginning! Happy 2013!
The beginning of a new year is always a time for self-reflection (I'm big on New Years Resolutions). This year, one of my New Years Resolutions is to find balance. As you've probably noticed, these past few months have been lacking in posts. So a part of this "balance" is figuring out how to introduce hobbies back into my life, things like art, baking, learning languages, and of course blogging.
With a semester of medical school behind me, I have a better idea of what I can handle. This semester, I hope to find a way to work my hobbies into my schedule so it's not just study study study all the time. In terms of art, I'm thinking for February, I'm going to challenge myself to do at least one sketch a week (I'll save painting and pastels for summer), and for March, a photograph a day. In terms of baking, I'm going for a more structured approach since the process takes such a large chunk of time, what with planning, buying ingredients, the actual baking, and decorating. And, of course, my goal for blogging for now is to post at least once a month; no more months with no posts >:|.
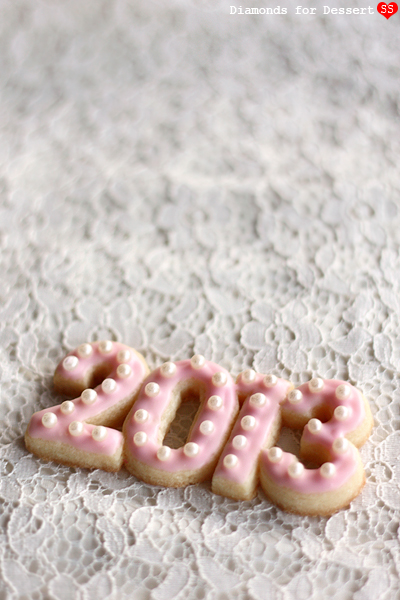
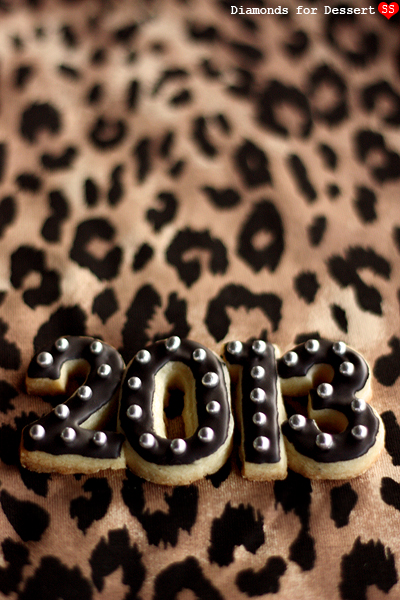
A little bit on these cookies. For NYE this year, my friends and I decided to stay in for a casual get-together (lots of Mario Party while sipping sangria). To match the mood, I opted for something a bit fancy, but not over-the-top, which resulted in these cookies. They're not too hard to make and are quite pretty. I really like the contrast between the more demure pink icing with white pearls and the wilder black icing with silver balls. These are perfect for both a fancy dressy event and a casual night-in chilling with friends.
P.S. Did any of you make any interesting New Years Resolutions? Share :)!
Tags:
cookie,
New Years,
sugar cookie
Subscribe to:
Comments (Atom)


